【Android】MenuとToolBar、TabLayout + ViewPagerを実装する。
Menu
  @Override
  public boolean onCreateOptionsMenu(Menu menu) {
      MenuInflater menuInflater = getMenuInflater();
      menuInflater.inflate(R.menu.main, menu);
      return super.onCreateOptionsMenu(menu);
  }
<?xml version="1.0" encoding="utf-8"?>
<menu xmlns:app="http://schemas.android.com/apk/res-auto"
    xmlns:android="http://schemas.android.com/apk/res/android">

    <item android:id="@+id/menu_search"
        android:icon="@drawable/action_search"
        android:title="search"
        app:showAsAction="ifRoom|collapseActionView"
        app:actionViewClass="android.support.v7.widget.SearchView"/>

    <item android:id="@+id/search_history"
        android:title="SearchHistory" />
</menu>
Menuの項目が選択された際の処理を実装する
@Override
public boolean onOptionsItemSelected(MenuItem item) {
    switch (item.getItemId()) {
        case R.id.search_history:
            Intent intent = new Intent(this, SearchHistoryActivity.class);
            startActivity(intent);
    }
    return super.onOptionsItemSelected(item);
}
階層的なメニューを表示する。
<item android:id="@+id/file"
    android:title="file" >
    <!-- "file" submenu -->
    <menu>
        <item android:id="@+id/create_new"
            android:title="create_menu" />
        <item android:id="@+id/open"
            android:title="open" />
    </menu>
</item>
ToolBar
Toolbar toolbar = (Toolbar) findViewById(R.id.toolBar);
setSupportActionBar(toolbar); // ToolBarを表示する
<?xml version="1.0" encoding="utf-8"?>
<android.support.v7.widget.Toolbar xmlns:android="http://schemas.android.com/apk/res/android"
    xmlns:app="http://schemas.android.com/apk/res-auto"
    android:layout_width="match_parent"
    android:layout_height="wrap_content"
    android:background="?attr/colorPrimary"
    android:minHeight="?attr/actionBarSize"
    android:fitsSystemWindows="true"
    android:id="@+id/toolBar"
    app:theme="@style/ThemeOverlay.AppCompat.Dark.ActionBar">
</android.support.v7.widget.Toolbar>
Backボタン(homeボタン)を有効にする
Toolbar toolbar = (Toolbar) findViewById(R.id.toolBar);
setSupportActionBar(toolbar);
getSupportActionBar().setDisplayHomeAsUpEnabled(true); // 戻るボタンが表示される。
getSupportActionBar().setHomeButtonEnabled(true); // 戻るボタンが押せるようになる。
Backボタンの処理を実装する
@Override
public boolean onOptionsItemSelected(MenuItem item) {

    switch (item.getItemId()) {
        case android.R.id.home:
            Intent intent = new Intent(getApplicationContext(), MainActivity.class);
            intent.putExtra(FROM_SEARCH_HISTORY, "Java");
            startActivity(intent);
        default:
            break;
    }
    return super.onOptionsItemSelected(item);
}
TabLayout + ViewPager
tabLayout = (TabLayout) findViewById(R.id.tabLayout);
viewPager = (ViewPager)findViewById(R.id.viewPager);
viewPagerAdapter = new ViewFragmentPagerAdapter(getSupportFragmentManager());
viewPagerAdapter.addFragments(searchFragment, "Search");
viewPagerAdapter.addFragments(new TrendFragment(), "Trend");
viewPagerAdapter.addFragments(new SubFragment(), "Sub");
viewPager.setAdapter(viewPagerAdapter);
tabLayout.setupWithViewPager(viewPager);
public class ViewFragmentPagerAdapter extends android.support.v4.app.FragmentPagerAdapter {

    ArrayList<Fragment> fragments = new ArrayList<>();
    ArrayList<String> tabTitles = new ArrayList<>();

    public ViewFragmentPagerAdapter(FragmentManager fm) {
        super(fm);
    }

    public void addFragments(Fragment fragments, String tabTitles){
        this.fragments.add(fragments);
        this.tabTitles.add(tabTitles);
    }

    @Override
    public Fragment getItem(int position) {
        return fragments.get(position);
    }

    @Override
    public int getCount() {
        return fragments.size();
    }


    @Override
    public CharSequence getPageTitle(int position) {
        return tabTitles.get(position);
    }
}
<?xml version="1.0" encoding="utf-8"?>
<RelativeLayout xmlns:android="http://schemas.android.com/apk/res/android"
    xmlns:tools="http://schemas.android.com/tools"
    xmlns:app="http://schemas.android.com/apk/res-auto"
    android:id="@+id/activity_main"
    android:layout_width="match_parent"
    android:layout_height="match_parent"
    tools:context="com.example.atuski.qiitaqlient.MainActivity">

    <android.support.design.widget.AppBarLayout
        android:layout_width="match_parent"
        android:id="@+id/appBar"
        android:layout_height="wrap_content"
        android:theme="@style/ThemeOverlay.AppCompat.Dark.ActionBar">

        <include android:layout_height="wrap_content"
            android:layout_width="match_parent"
            layout="@layout/main_tool_bar_layout" />

        <android.support.design.widget.TabLayout
            android:layout_width="match_parent"
            android:layout_height="wrap_content"
            android:id="@+id/tabLayout"
            app:tabMode="fixed"
            app:tabGravity="fill">
        </android.support.design.widget.TabLayout>

    </android.support.design.widget.AppBarLayout>

    <android.support.v4.view.ViewPager
        android:layout_width="match_parent"
        android:layout_below="@+id/appBar"
        android:layout_height="match_parent"
        android:id="@+id/viewPager">

    </android.support.v4.view.ViewPager>
</RelativeLayout>
Javaの変数とバイナリサーチ(二分探索)【Javaで学ぶアルゴリズムとデータ構造 】
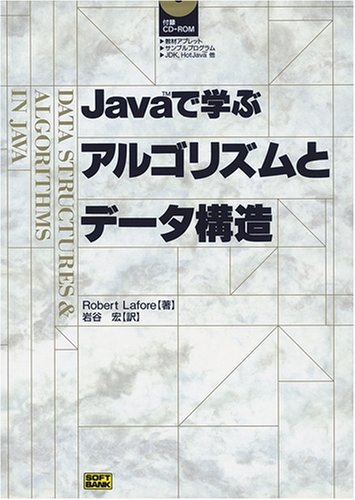
Javaで学ぶアルゴリズムとデータ構造(Robert Lafore (著), 岩谷 宏 (翻訳) )
を読んで学んだことのメモです。
目次
Javaの変数についておさらい。
参照
- Javaでの変数は、以下の2種類
- プリミティブデータタイプ
- int,float,double,boolean など
- オブジェクト変数(参照:reference)
- プリミティブデータタイプ
new演算子、代入、引数
- newは参照(オブジェクト変数)を返す。
- Javaではオブジェクトは常に参照渡し。
- 新たな変数を作成しない。
- オブジェクトそのもののコピーもされない。
- プリミティブデータタイプを渡す時は常に値渡し。
- 値渡しでメソッドの引数で渡される場合は、メソッドの呼び出し時に、新たな変数が作成される。
- 呼び出し側の引数の値がその新たな変数の中にコピーされる。
等値性と同一性
- プリミティブとオブジェクトで、等値演算子==の効力が変わる。
- プリミティブ : 等値を検証する。
- = 等値性
- オブジェクト : 同じオブジェクトを参照しているかを検証する。
- = 同一性
- オブジェクトで値を検証したいのならば、java.lang.Object#equalsを使用すること。
- プリミティブ : 等値を検証する。
バイナリサーチ(二分探索)
バイナリサーチ(二分探索) ... 配列中のデータ項目数の対数に比例した実行時間を要する。
数字当てゲーム
皆さんは、1から100までの数字の中から出題者が選んだ数字を当ててくださいと言われたら、最大何回で当てられるでしょうか。
出題者はこちらの言った数字に対して、「ビンゴ」か「大きい」か「小さい」で答えてくれます。
可能性のある範囲の真ん中の数字をどんどん言ってくだけで、なんと最大7回で出題者の選んだ数字を当てることができます!!
例 : 71 1回目 : 50 ... 小さいですとの返答。残りの範囲は51 〜100になります。 2回目 : 75 ... 大きいですとの返答。残りの範囲は51 〜74になります。 3回目 : 62 ... 小さいですとの返答。残りの範囲は63 〜74になります。 4回目 : 68 ... 小さいですとの返答。残りの範囲は69 〜74になります。 5回目 : 71 ... ビンゴです。
サンプルコード
任意の値が格納されている要素を返す、探索メソッドを実装します。
public class NumTargetGame {

    public static void main(String[] args) {

        // 1〜100までの数字を用意
        // 正解をきれいにするためにindex=1 から始めます。
        int[] numArray = new int[101];
        for (int i = 1; i < numArray.length; i++) {
            numArray[i] = i;
            System.out.println(String.valueOf(numArray[i]));
        }
        find(numArray, 71);
    }

    /**
     * 二分探索
     *
     * @param numArary
     * @param answer
     * @return
     */
    private static void find(int[] numArary, int answer) {

        int lowerBound = 1;
        int upperBound = numArary.length - 1; //100
        int curIn;
        int step = 0;

        while (true) {
            step++;
            curIn = (lowerBound + upperBound) / 2;

            System.out.println("lowerBound : " + lowerBound + " upperBound : " + String.valueOf(upperBound));
            System.out.println("curIn + " + String.valueOf(curIn));

            if (numArary[curIn] == answer) {
                System.out.println(String.valueOf(step) + "回で" + String.valueOf(answer) + "を見つけられました。");
                break;
            } else if (lowerBound > upperBound) {
                System.out.println("出題者は範囲外の数字を選びました。");
                break;
            } else {
                if (numArary[curIn] < answer) {
                    lowerBound = curIn + 1;
                } else {
                    upperBound = curIn - 1;
                }
            }
        }
    }
}
